• Home
  • Photos
  • Shop Tutorials
  • Cart
  • Check Out

Suitably Stamped with Michelle Suit

You can't use up creativity....the more you use...the more you have.

Categories: Uncategorized

“Simon” Says – NEW Punch Art Critter Joins the Family!


“Simon” the Stingray has joined the Suitably Punched Family 

Happy Monday Everyone!
It has been a very busy week here in the studio and I am having a blast.  I’ve been playing with lots of new products and finding “lost” treasures along the way.  “Simon” is one of those treasures.

About a year and a half ago I was asked to share my love of punch art at Stampin’ Up’s annual Convention in Salt Lake City, Utah.  It was truly the BEST experience EVER!  While I was creating fun, new “critters” to share on the Main Stage, I found I had come up with way too many to fit into the time allowed.  So….poor Simon ended up just floundering out there on his own until now. 

Now…for those of you who aren’t sure exactly what the heck “punch art” is, it’s taking shapes made with punches (and framelits/thinlits) and creating something or, in this case, someone out of them.  It’s my passion!  I absolutely love the endless possibilities.
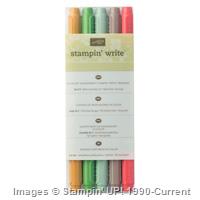
“Simon” was made using just ovals and circles…that’s it!  I decided to make him using the Dazzling Diamonds Glimmer Paper and I think it just makes him come alive.  I used my Stampin’ Write Markers to add color.  The insides of his eyes and mouth are made using Basic Black cardstock.  Now, I stamped the coral in the background to look like silhouettes in the shadows in Archival Black Ink and then stamped the coral again with Versamark Ink in the foreground and heat embossed it using Tangerine Tango Embossing Powder (retired).  You could make the coral any color at all because this has such a whimsical feel.

I love the effect of the background.  That might need to be a video tutorial.  LOL  It was a blast to create and I have a lot of other project ideas floating around in my brain for it.

To see all of the products used on Simon’s card just check below.  Remember, you just need to click on the product and you’ll be taken right to my Online Store at www.SuitablyStamped.stampinup.net.  You can shop to your heart’s content.

I hope Simon brings a little sunshine into your day today and I hope you’ll give punch art a try very soon.

Wishing you a magical day,
Michelle


135315
Dazzling Diamonds Glimmer Paper – 135315
Price: $5.00
100730
Whisper White 8-1/2″ X 11″ Cardstock – 100730
Price: $8.50
122925
Calypso Coral 8-1/2″ X 11″ Cardstock – 122925
Price: $7.00
126944
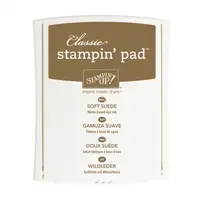
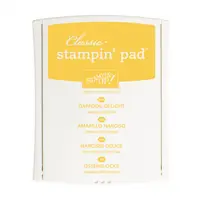
Daffodil Delight Classic Stampin’ Pad – 126944
Price: $6.50
126952
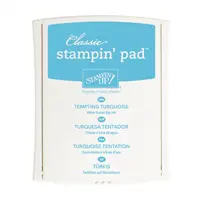
Tempting Turquoise Classic Stampin’ Pad – 126952
Price: $6.50
140931
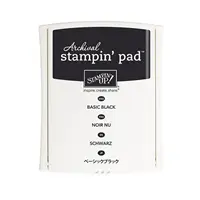
Basic Black Archival Stampin’ Pad – 140931
Price: $7.00
102283
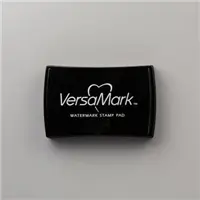
Versamark Pad – 102283
Price: $7.50
119869
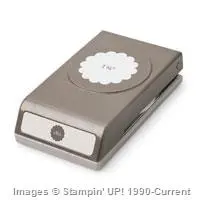
1/2″ Circle Punch – 119869
Price: $6.00
119868
1″ Circle Punch – 119868
Price: $13.00
118074
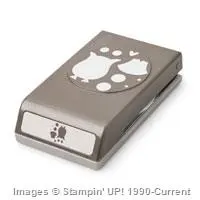
Owl Builder Punch – 118074
Price: $18.00
120908
Small Oval Punch – 120908
Price: $12.95
129381
Ovals Collection Framelits Dies – 129381
Price: $27.00
129053
Heat Tool (Us & Can) – 129053
Price: $30.00
101610
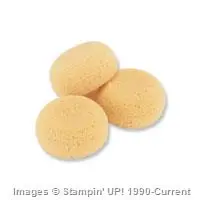
Stamping Sponges – 101610
Price: $3.50
129120
By The Tide Clear-Mount Stamp Set – 129120
Price: $20.00
131910
By The Tide Wood-Mount Stamp Set – 131910
Price: $28.00
Supply List
REMINDER:  BURGERS AND CARDS is TOMORROW evening from 6:30 til 9:00 p.m. at Foster’s Grille in Old Town Manassas.  RSVP to save your spot.  Drop in and make one card or make all four.  Want multiples of the same card?  You can do that too.  Cards with envelopes are $2.00.  Bring a friend and your first two cards are FREE.  Email me and let me know you’ll be there!  shellsuit@verizon.net

Categories: Uncategorized

Bloomin’ Love

Hello, my friends!

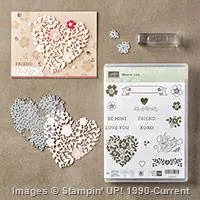
I’ve been in the studio today and I have a new card to share with you.  This is one of the designs we created at the Tall Oaks stamp camp Monday night and the ladies loved it.   It uses one of the most beautiful products from the New Occasions catalog, the “Bloomin’ Heart” Thinlits Dies.  One of the bonuses is that it can be bundled with the adorable, “Bloomin’ Love” Stamp Set with a 15% discount.
Here’s the card we created….
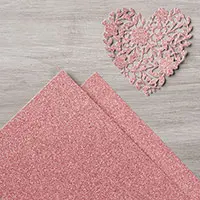
Can you see those gorgeous, sparkly pink flowers??  Those are made with our newest Glimmer Paper that now comes in “Blushing Bride”.  It is positively yummy!  It really makes this card just POP.
Okay….here are all of the products used to create this beauty.  Just click on the item(s) you’d like to add to your shopping cart and you’ll be taken directly to my Online Store for check out.
131198
Blushing Bride 8-1/2″ X 11″ Cardstock – 131198
Price: $7.00
100730
Whisper White 8-1/2″ X 11″ Cardstock – 100730
Price: $8.50
140550
Blushing Bride Glimmer Paper – 140550
Price: $5.00
140818
Bloomin’ Love Photopolymer Bundle – 140818
Price: $35.50
131172
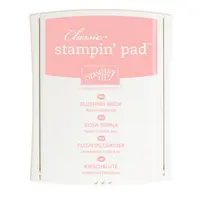
Blushing Bride Classic Stampin’ Pad – 131172
Price: $6.50
131179
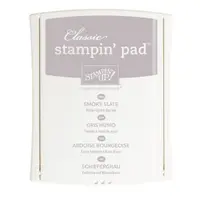
Smoky Slate Classic Stampin’ Pad – 131179
Price: $6.50
137364
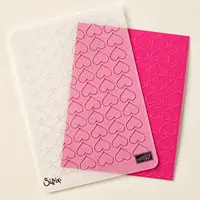
Happy Heart Textured Impressions Embossing Folder – 137364
Price: $7.50
119247
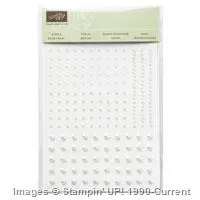
Pearl Basic Jewels – 119247
Price: $5.00
113439
Big Shot – 113439
Price: $110.00
104430
Stampin’ Dimensionals – 104430
Price: $4.00
104332
Snail Permanent Adhesive – 104332
Price: $7.00
Supply List

Have you signed up for the “Birthday Bash Marathon” yet?  It’s filling up so you’d better act fast!

Wishing you a wonderful day ahead….
Stamped Blessings,
Michelle


Categories: Uncategorized

The Sky is the Limit

Happy Thursday, Friends!
It’s true…the sky IS the limit.  I knew when I saw this stamp set that I needed it.  It was even better that I could get it for free.  ðŸ™‚  When I first met my husband, Mike, 32 years ago (wow!) he was just a hunky junior at Virginia Tech majoring in Electrical Engineering and lo and behold he had his private pilot’s license.  Sounds exciting, right?  Yeah….he took me flying on our first date and it was definitely “eventful”…NOT it the way you might be thinking.  LOL  If I have time at some point I’ll have to tell you the whole story.  Let’s just say it included my door coming open when we were VERY high in the sky!  Yeah…great first date!  So….long story short…I love this stamp set because it reminds me of that date.  Here’s a peek at the whole stamp set….
WOOD MOUNT #141282    CLEAR MOUNT #141349
So fun, right??  It’s perfect for lots of different occasions and can be used for both feminine and (the dreaded) masculine cards.  Below are all of the supplies I used for this card design.  As always, you just have to click on the product(s) you’d like to order and it will be added to your shopping cart at my Online Store.  Now…this set is not available for purchase.  It’s only available FREE with a $50 purchase.  Here’s a link to check out the other items available for FREE.
SALE-A-BRATION CATALOG
Okay….Here’s what I used…

I’ll be heading to the post office to mail out more Sale-A-Bration catalogs soon so be sure to let me know if you’d like one.
Stamped Blessings,
Michelle
Categories: Uncategorized

Apple of My Eye…Orange You Sweet!

 Hello, my friends!

Happy New Occasions Catalog and Happy Sale-A-Bration!

Sale-A-Bration is truly one of the most exciting sales of the Stampin’ Up! year with SO much excitement (and FREE Stuff) in store.  Here’s a look at both of the new catalogs….Remember….if you haven’t received a copy of them yet, just message me or leave me a comment here and I’ll get one out to you asap.

From January 5th through March 31st, for every $50 you order from ANY of our catalogs, Weekly Deals, Clearance Rack etc., you get to choose one FREE ITEM of your choice from the exclusive Sale-A-Bration products.  There are a few of them that are only available for a limited time so you’ll want to be sure to get those first.  If you just can’t wait to see what’s inside both of these catalogs, you can check them out by CLICKING HERE
Today I have a fun card created with one of my faves from the Occasions Catalog.  The set is called “Apple of My Eye” Item #140736.  It can be found on page 47.  It’s SO stinkin’ cute.
Here’s what I came up with….
Can you see the way the orange slices shimmer?  That’s all thanks to another new product in the Occasions Catalog called the“Wink of Stella” Glitter Brush.  It comes in two different colors….
Gold – Item #141898 and Clear – Item #141897
I used the Clear on this card and I have to tell you….I’m stocking up on these babies!!
Check out the inside….

Isn’t that FUN??  I love this card design.  I was thrilled when my friend, Patty Bennett, shared the details on the basic fold for this one….so thrilled that I had to sit right down and make my own version!
Below you’ll find all of the products used to create this little beauty.  To order, just click on the item(s) and you’ll be directed to my Online Store and the item(s) will be added to your shopping cart.

Before I go….be sure to check out these Weekly Deals….

Stamped Blessings to you,
Michelle

Categories: Uncategorized

Flurry of Wishes

Hello, my friends!

Happy November!  I can’t believe it’s here already.  Whew!
Don’t get me wrong, I LOVE fall.  Love, Love, LOVE it.
I’ve been really busy with lots of family things recently and being back in the studio this weekend sure felt good.  I’ve also been gnawing on my fingernails in anticipation of our trip to Disney this coming week.  No….not just a “ho hum” trip to Disney…..  I’ll be running my second half marathon down there on Saturday.  I did it for the first time last year at Disney and it rained the entire time.  It was NOT fun but I finished and I REALLY want to finish it again this year.  Keep me in your thoughts and prayers, please (and cross your fingers and toes!).

Ok…I’m sharing a new project here today and you’re the first to see it.  Woot!  I don’t know if you’ve seen the awesome, new “Square Pillow Box” thinlits that are in the Holiday Catalog but my oh MY do I love them.  Let me show you what I came up with and then I’ll share all of the supplies I used.
Oh!  I made a “Double” box.  My awesome friend, Leena Girsa, in Canada has a fabulous video on making the doubles.  You can check it out HERE.

Isn’t it fun?!  I love finding fun holiday treats to use in “gift” projects for the holidays.  These stinkin’ cute hot chocolate packs and individual packets of mini marshmallows are from my local craft store.  Don’t you love how the snowman is peeking through the “window”?  So sweet!  The “single” square pillow box measures about 4″x4″ and this “double” measures about 4″x 8″.  They are both perfect for packaging up treats for the holidays (actually for any occasion).

Okie doke….Here’s your supply list.  If you have any questions, don’t hesitate to ask.  I’m here for you!  Remember, just click on the items you’d like to order and you’ll be taken right to your shopping cart at my Online Store at http://stampinsuitsme.stampinup.net

Wishing you a wonderful week ahead and a glorious fall.

Stamped Blessings,
Michelle

Categories: Uncategorized

Happy Haunting

Hey there, stampers!

I recently had the pleasure of sharing my love of stamping with a new group of ladies here in Northern Virginia at our first stamp camp together.  We had SO much fun and I want to share one of the cards we made with you.  It’s called “Happy Haunting”….

 
I absolutely love the way it turned out.  It reminds me of when I was growing up and how the kids in my neighborhood would wait all day long on Halloween until it was time to finally put on our costumes and start trick-or-treating.  So many fond memories….  The background on this card was made by starting with a piece of Whisper White card stock, two ink pads and two stampin’ sponge wedges.  I sponged the top 1/3 of the piece with Night of Navy ink and then added the next 1/3 with Rich Razzleberry ink and blended them together.  
I have the whole list of supplies here for you so it’s easy to check off what you have and what you’ll need to order to make this little beauty.  Remember,  just click on the item(s) you’d like to add to your cart and you’ll be taken right over to my Online Store.  How easy is that??
 Here you go…

Okie dokie…..  I hope you have a blast creating some spooktacular cards for your very own Halloween fun.

Stamped Blessings,
Michelle

Categories: Uncategorized

“Spooky” Sweets

Good Morning Friends!

Well….that didn’t go as planned.  Since my last post, my blog decided it didn’t like the way things were working.  I haven’t been able to post as planned but it looks like (fingers and toes crossed) it’s working now.  We shall see.  I’ve had SO many things to share and I’ll be playing “catch up”.  Woot!

Have you seen the Holiday Catalog yet??  Oh My Smurf!!  It is UH MA ZING!  If you don’t have your own copy yet, leave me a comment or message me at shellsuit@verizon.net and I’ll get one out to you jiffy quick.  You DO NOT want to miss this one!

Now you may not know this about me but FALL is my absolute favorite time of year.  I LOVE everything about it…the colors…the smells…the pumpkins and leaves….Ahhhhh!  Well, I’ve been in full “Fall Mode” in the studio and I have a fun and “Spooky” project for you today.  Check this out…

 
How fun is that??  These little “Mini Coffee Cups” are the bomb dot com!  There are so many ways you can use them.  I just love them wrapped in our NEW “Happy Haunting” Designer Series Paper.  Aren’t those ghosts sweet?  I will have all the supplies I used listed at the end of the post so stay tuned.
Here are the measurements and instructions for the “cup carrier”…
Box:  Cut one piece of card stock at 4″ x 6 3/4″ and score all four sides at 1″.
Cut two opposite sides of the score lines up to the intersecting score lines.
Cut the corners off on the diagonal.  This will ensure easy assembly.  Fold on all score lines and adhere with strong adhesive.  I use Fast Fuse.
To decorate:  Cut two strips of DSP at 3/4″ x 3 3/4″ for the front and back sides of box and
cut two strips at 3/4″ x 1 3/4″ for the sides of box.  Adhere.
Handle:   Cut one piece at 1 7/8″ x 11″ and score at 1 1/2″, 5 1/2″ and 9 1/2″.
Fold in half and score with a bone folder.
Adhere together with Fast Fuse or adhesive of your choice.
Using either a circle or oval punch, punch a hole for the handle as shown above.
Fold the flaps out at the bottom forming an upside down “T”.  Adhere piece to the inside of the box using Fast Fuse or strong adhesive of your choice.
There’s just no end to the kinds of treats you could fill these sweet cups with and you could add a gift card as an added bonus too.
Okay….here are the items you’ll need to create some of your very own…
First, the items you can order from my Online Store.  Just click on the item(s) you’d like to get and you’ll be taken to your shopping cart at my store.  Don’t worry…there are NEVER any lines and the lights are always on. 😉  
Built for Free Using: My Stampin Blog

The extras:

Mini Coffee Cups w/Lids:
Ordered from http://www.webstaurantstore.com/

Cups – 4oz. Paper Hot Cup 50/ $2.89 order number is 9994W


Lids – 4oz. Hot Paper Cup Travel Lid White $4.39 Order number is 999L4W
 
“Googly Eyes” and Striped Halloween Straws were purchased at a local craft store.
 
Okay…so there you have it!  A fun and easy project that’s sure to make everyone smile.  
Side note:  Those Caramel Apple Milky Way bars are ADDICTIVE!  Just sayin’…
 
Want more fun ideas?  Check out my PINTEREST BOARDS 
Want to keep up with me on Facebook?  JUST CLICK HERE
 
Hope to see you again soon!
Stamped Blessings,
 
Categories: Uncategorized

FREE Video Tutorial – “Pocket Bac” Tote

Happy Tuesday, my friends!
I’m so happy you stopped by!  I have a fun, new project for you today.  I created a sweet, little “tote” for the new “Pocket Bac” (hand sanitizers) from Bath and Body Works.  They are easy peasy and SO quick to make.  They would be great for all sorts of occasions, holiday treats etc.  With back to school starting soon, I know these will be a favorite treat sent in to your child’s new teachers.  (Trust me!  I speak from experience.)
  
Isn’t that fun??  I just love them!  I’m sure I won’t be the only crafter walking through B and BW trying to coordinate card stock with Pocket Bacs!  LOL
Ready to see how they go together?  Okay then….Here you go!
CLICK HERE TO WATCH VIDEO NOW 
Remember….for all of your stampin’ supplies you can head right over to my Online Store.
Go to http://stampinsuitsme.stampinup.net and voila!
Wishing you a magical day!
 
Categories: Uncategorized

“The Open Sea” and a 10k

Hey there, Stampin’ Friends!

I know it’s been a few weeks since I’ve posted and for good reason.  I’ve been working hard on some new ideas for you and really getting things accomplished.  I also just returned from Stampin’ Up’s North American Convention in Salt Lake City, Utah.  Whew!  What a fun and busy time!  While I was there I managed to squeeze in a local 10k race too.  LOL  I know….CRAZY, right??  Here’s a photo of me and my friend, Linda, after the “Deseret News Classic 10k” race.  It was rough getting to that finish line but we did it!

Convention was incredible as always.  SO many terrific presentations, new products and project ideas and seeing SU friends was simply the icing on the cake.  We were treated to the debut of the brand new “Holiday Catalog” and all I can say is, “WOW!”.  You will be blown away.  I’ve arranged for a direct mailing of the catalogs to all of my regular customers and I’d love to send one to you.  Please email me at shellsuit@verizon.net to get your very own copy.  The catalog goes “LIVE” to the public the first week of September.  I will be sharing projects made using products from it very soon so be sure to stay tuned.

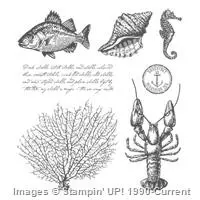
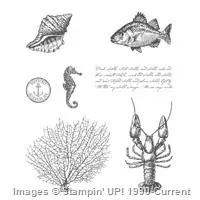
Now for today’s card share…. I absolutely LOVE “The Open Sea” stamp set.  It was one that really caught my eye right away.  Here’s the card I designed with it this week…

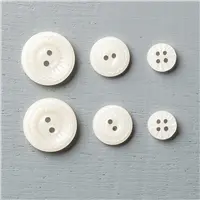
Somehow I always forget how much I love “collage” stamping.  I started with a Cherry Cobbler card base measuring 8 1/2″ x 5 1/2″ and added a layer of Island Indigo measuring 5 1/4″ x 4″.  The stamped layer is a piece of Naturals Ivory measuring 5″ x 3 3/4″.  I then randomly stamped all of the images in various colors including Cherry Cobbler, Island Indigo, Tip Top Taupe and Early Espresso.  I love the way it looks.  The focal point (circle) with the ship and greeting were stamped on Naturals Ivory in Island Indigo and Tip Top Taupe.  I backed it with a circle that’s just a tad larger in Early Espresso.  The embellishments include some Cherry Cobbler Baker’s Twine and a button from the Neutrals Button Collection.  It’s hard to tell from the photo but the circle with the ship etc. is popped up on Stampin’ Dimensionals to give it some texture and the button is adhered using a Mini Glue Dot.
It really is a quick and easy card that gives you lots of “bang for your buck”.

Since masculine cards are not as “easy” for me, I’m always SO happy to have this versatile stamp set in my collection to use.  A complete list of products used is below for your easy ordering convenience.  Just click on the items you need and they will be added right to your Shopping Cart.  You’ll be redirected to my Online Store where you can shop for any other supplies you may need.  Be sure to check out the Weekly Deals and Clearance Rack while you’re there.

First…here are the Weekly Deals….

And now for the supply list….

Built for Free Using: My Stampin Blog

Thank you so much for stopping by today.  I hope to see you again soon!

Stamped Blessings,

Categories: Uncategorized

You’re Sublime

Happy New Year!

Yep!….You heard me….The brand NEW Stampin’ Up! Catalog is hot off the press and it’s a DOOZY!
There are SO many amazing products!  My copy of the catalog is dog eared and full of sticky notes already.  If you haven’t gotten your very own copy yet, just send me a quick email and I’ll get one in the mail to you jiffy quick.  My email is shellsuit@verizon.net.

Alrighty….now for the first post with a NEW stamp set….
This is seriously stinkin’ cute!  This set is called, “You’re Sublime”.
The set has five adorable stamps with the sentiments included with the images.  It’s full of fun and whimsy and it’s perfect for making cards for all occasions.

Check out the set of five cards I created today.  They would be great as stand alone cards or also to make as a set to give as a gift to another card loving friend.

Don’t you just love the images?  They are super quick to create.  I just stamped the images on Whisper White card stock in Tuxedo Black Momento Ink and then colored the images with my Stampin’ Up! Markers.  These would also be perfect to use in projects with the kids in your life.  I mean…who doesn’t love to color??

The set is available in both Wood Mount (Item # 138372  $27.00) and Clear Mount (Item #139309  $19.00).  These are all made using the Crumb Cake Note Cards & Envelopes and the DSP (Designer Series Paper) is the NEW “Cherry on Top” 6″x6″ Paper Stack.  All of the supplies used are listed below.  Just click on the items you’d like to add to your shopping cart and you’ll auto”magically” be taken right to my Online Store.  Cool, huh?

Here are all of the products I used….

Built for Free Using: My Stampin Blog

Okay….now that we’re off and running with the NEW catalog, make sure to stop by often to see all of the fun, new projects I’ll be sharing with you.

Wishing you a magical day!

« Previous Page
Next Page »

Sept.-Dec. 2026 Catalog

Stampin' Up! Catalog

Subscribe to Blog via Email

Enter your email address to subscribe to this blog and receive notifications of new posts by email.

Search

Copyright © 2026 · Theme by Blog Pixie

Copyright © 2026 · Sasha Rose Theme on Genesis Framework · WordPress · Log in